
Hello there,
I had a lovely class last week using the set Secret Garden from the Spring/Summer Catalogue, this one will be staying with us in the new catty due out on the 1st July! If you would like a FREE copy of the NEW catty then why not consider a place on my new Stampers 6 club starting on the 10th June and I will send you a hard copy free of charge!!
See HERE for more details on the club and email me to reserve a spot sarah-janerae@sky.com.
So, back to today's card. I did a little tutorial for the flower on this card so keep scrolling down for all the details :-))))
This is the card first of all, we used the Tea for Two DSP pack with a doily and some spotty scallop ribbon which is on the Retirement List and of course the Secret Garden stamps and dies ;-)...

a close up of the flower

as you can see the flower is nice and deep, definitely a large letter or perhaps you could make a nice box to send it in, there is a tutorial for making a box HERE too!

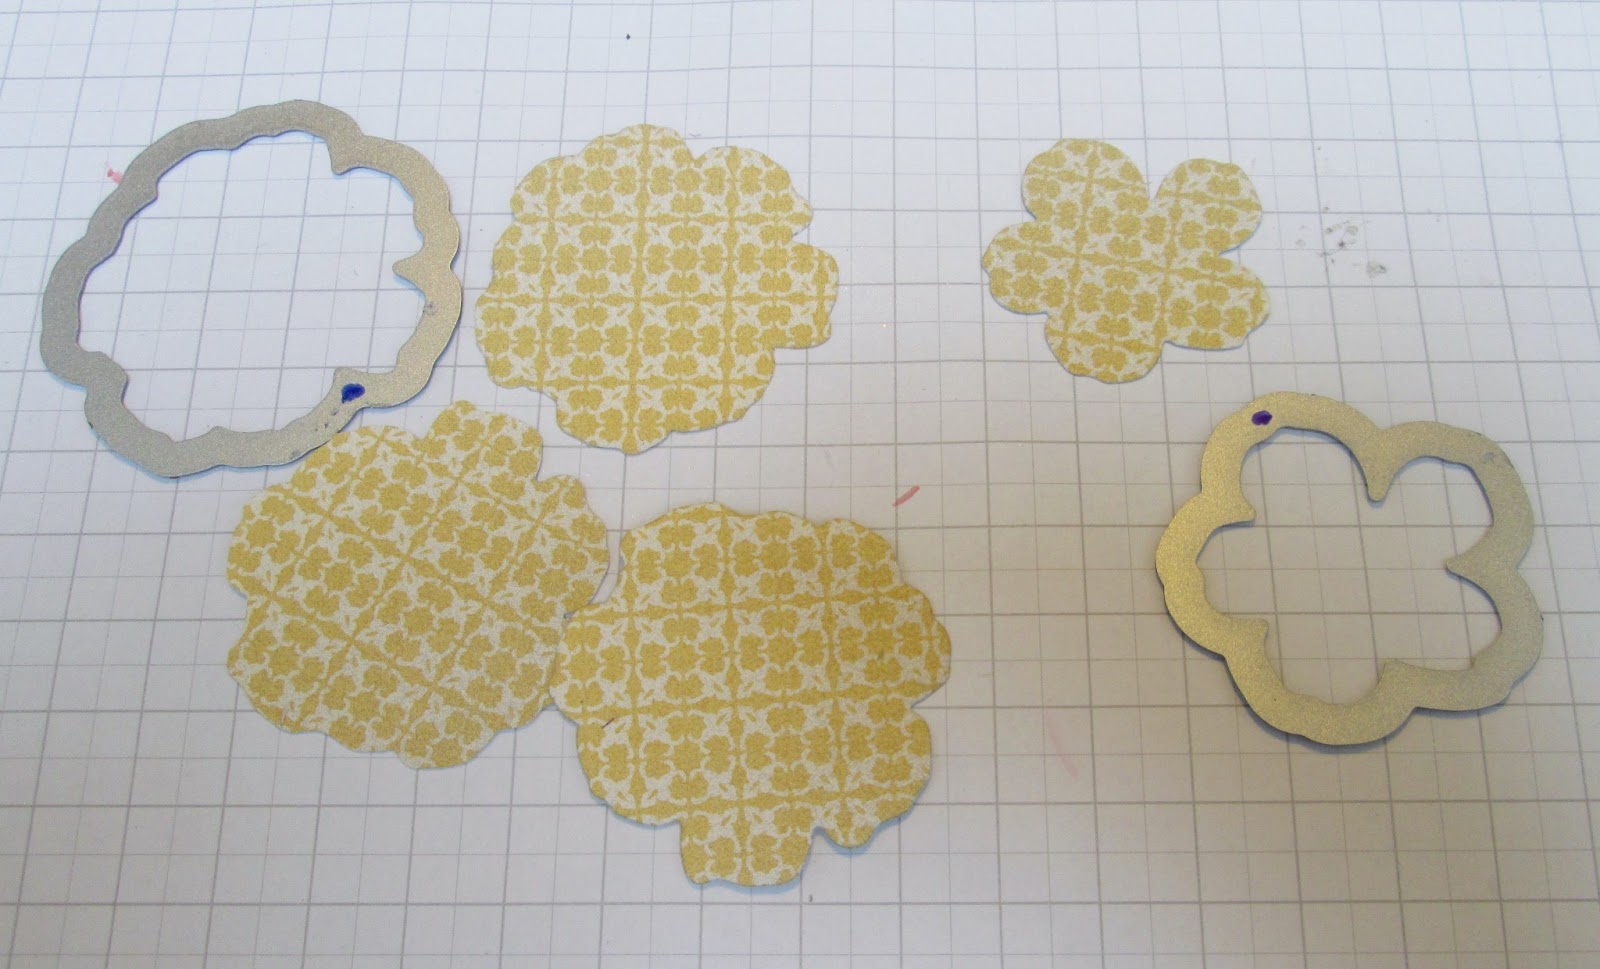
So, for this flower you just need the dies from the set, a strip of paper approx 6cm x 20cm and some water or isopropyl alcohol in a spritzing bottle, mine is the alcohol with shimmer paint mixed in

you need the two rounder flower dies from the set for this flower

now, lay the larger die on the end of the paper, then concertina fold so you will be cutting through three layers of the paper, this should cut fine but I wouldn't recommend any more layers and I'm pretty sure it wouldn't do three layers of card

you can seen the layers better here, you should have enough excess at the end for a single smaller flower

run through your big shot (or other machine)

this is what you should have, and with just one pass through too!
now, lightly spritz with your chosen liquid, you are aiming for the flowers to be damp, they will just take a lot longer to dry otherwise and that is unnecessary for this flower, you also risk them tearing of they are too wet.

next fold the flowers up around all the edges to make a cone shape

then twist the end firmly to make the cone

repeat for all the flowers

now, while they are still wet gently tease the flowers open just a touch like so and leave to dry completely (this should be enough time to make your card, or 4-5 mins ;-))

Once dry add a drop of strong glue right in the centre point inside one of the large flowers

take your next large flower and add it to the first, try not to pull the flowers open at this point, just let the next flower do the work of opening them just enough

Repeat until you use all the flowers with the smallest in the centre. I used my tweezers to add each flower but you can use a pair of scissors to so you're not pulling it out too far

Leave so the glue can dry for a good few minutes and this is what you should end up with!

and this is three of the flowers clustered together on top of a box

closer...

and together with the card :-)

Whew!! Well, thanks for taking the time to read today's tutorial!
I will be back with the other card from the class tomorrow
'till then happy Stampin'!

Gorgeous card and box! Love the tutorial on how to make the beautiful flowers!! Thanks!
ReplyDeleteWOW!! I love this And I will have to give it a go one day!! Thank you for sharing the tutorial!!
ReplyDelete